How To Add or Delete Sites On Your Clients on Automation Software Account
One of the most awesome feature on Clients on Automation Software is that you are allowed to add Multiple Sites (with different domains) on One Single Clients on Automation Software account.
Ok let's jump into how to Add Sites to your account.
Adding Sites
All new sites that are first added to your account will come with our Clients on Automation Software subdomain, ie: yourawesomesite.clientsonautomationsoftware.com
You then can subsequently connect your new site to your own Custom Domain.
Step 1: Simply log in to your Clients on Automation Software domain or Custom Domain by adding "/login" to the end of the URL. IE: yourawesomesite.clientsonautomationsoftware.com/login or yourcustomdomain.com/login
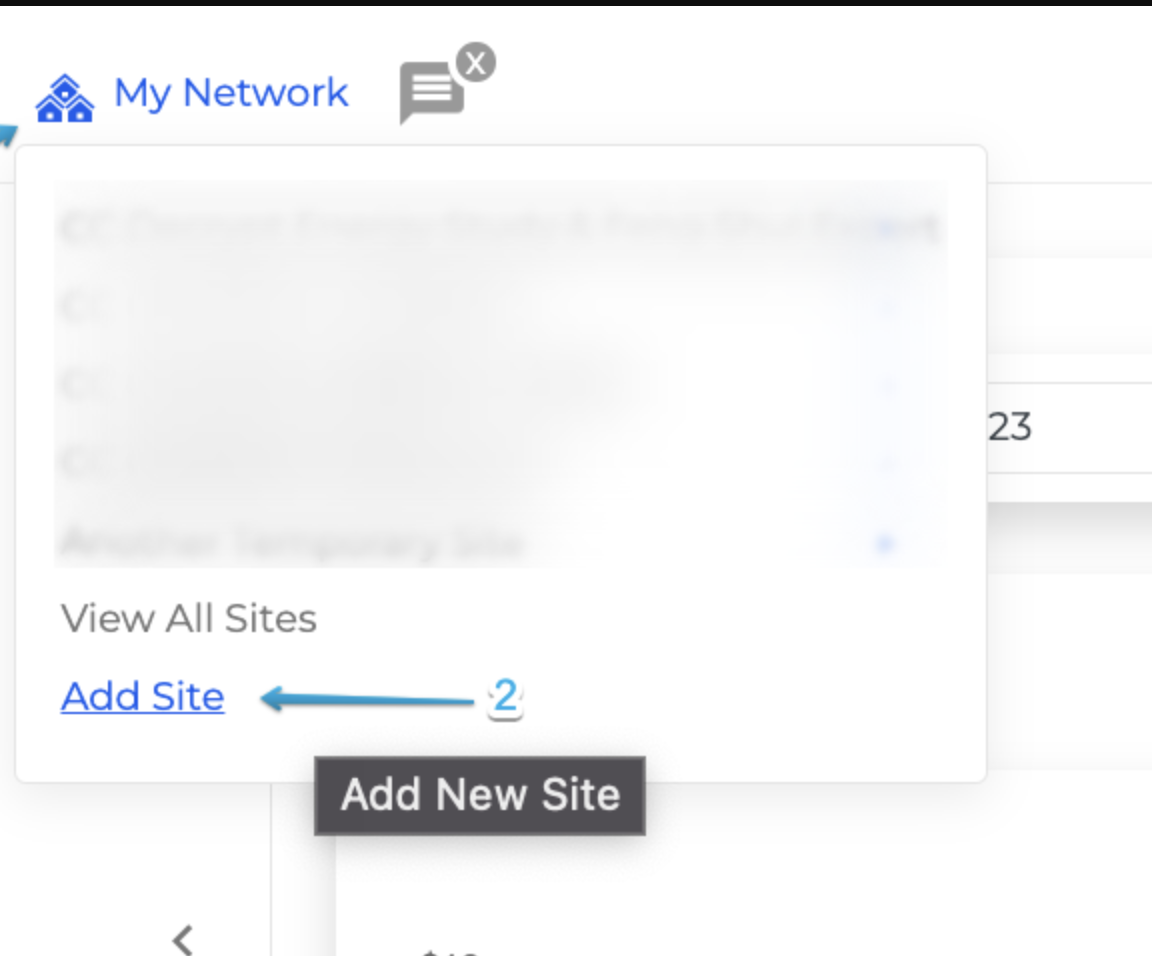
Step 2: On your dashboard top navigation bar, hover over My Network > Add Site
Step 3: You will need to setup your site here. Enter your Site Address and your Site Title.
- Site Address: As your new site is being created, it will use our Clients on Automation Software subdomain. You can enter something unique to your business and easy to remember.
**IMPORTANT** The Clients on Automation Software subdomain that comes with your new site creation CANNOT be changed unless you connect your own custom domain. If you wish to continue using your site with the Clients on Automation Software subdomain, make sure you use something unique and easy to remember.
- Site Title: This will be your site name and can be changed later if required.
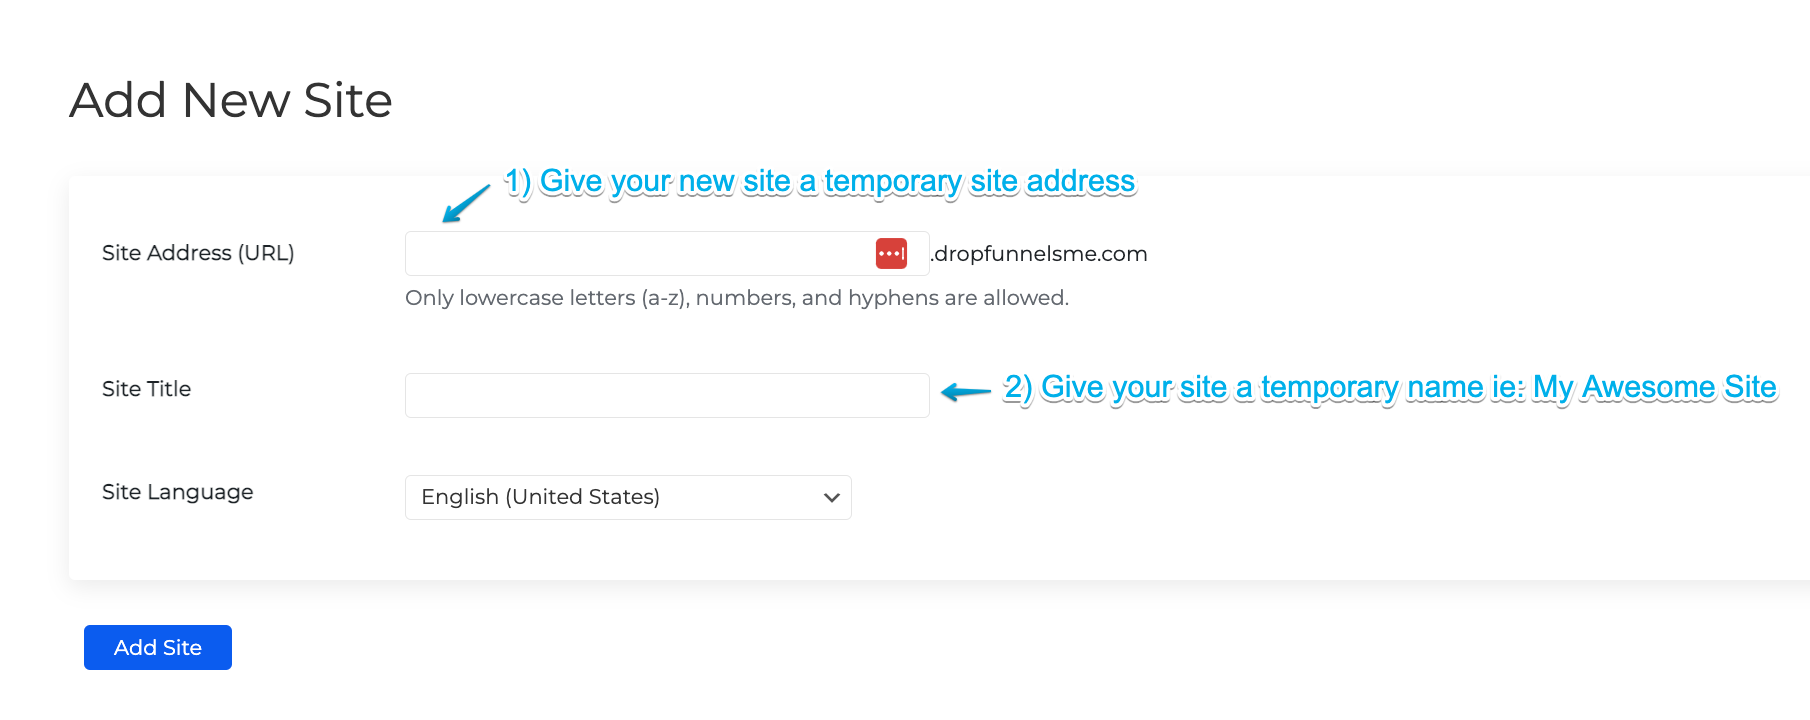
Step 4: Once you've set your Site Address and Title > Click "Add Site" and wait patiently for a few seconds while our system work its magic.
Step 5: Once your new site is successfully created, you will be redirected to the login page where you can use the same login credentials to login to your new site's dashboard.
Accessing the site in the future:
In order to access your new site, you can simply hover on "My Network" from your dashboard top menu bar and click on the site that you would like to access.
Alternatively, you can also log in directly to your site by adding "/login" to the end of the URL.
IE: https://mytemporarysite.clientsonautomationsoftware.com/login
All the sites under your account shares the same username and password and can be used across all sites.
If you want to connect your custom domain to your new site, you can follow the instructions on this article.
Or if you want a hassle free process, we do offer FREE custom domain hookup service. Click here if you wish us to connect it for you: https://customdomainsetupsupport.paperform.co/
Deleting Sites
You may need to delete unwanted sites from your account to free up your site quota. To do this, please follow the steps below:
**IMPORTANT** Please be extra careful when deleting your site. Once your site is deleted, it is totally irrecoverable. We do not take any responsibility if you accidentally delete your site.
NOTE: Do not remove any DNS records prior to the steps below. Once you remove your DNS records, you won't be able to access your Clients on Automation Software site anymore unless you reached out to us to reset your site back to the signup domain.
Step 1: To delete your site, you need to be login into the dashboard of the site that you want to delete.
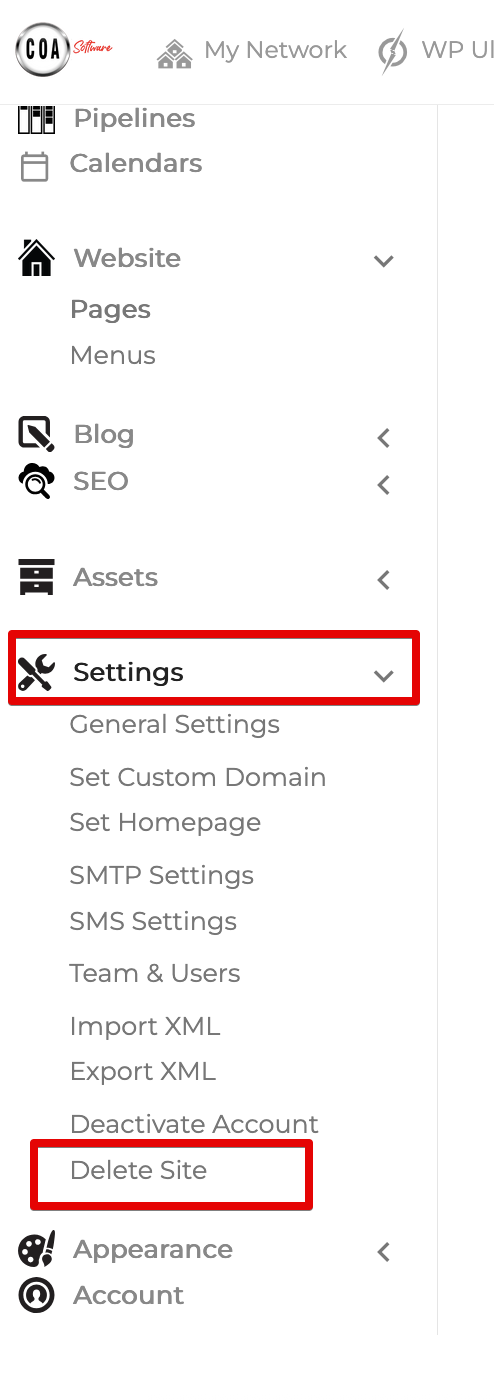
Step 2: On your dashboard left navigation panel > go to Settings > Delete Site
Step 3: Make sure you read this page clearly. Once you're sure, check the box and click "Delete My Site Permanently".
An email link will be sent to confirm your action. Your site will not be deleted until this link is clicked.

Step 4: Check your email for the link. If you really want to delete your site, click the link below. You will not be asked to confirm again so only click this link if you are absolutely certain.
**IMPORTANT** Your site is irrecoverable and we would like to stress that we are not responsible for any deleted sites.
Step 5: Once the link is clicked, your site will be permanently removed from your account.
Step 6: Remove any DNS records for the domain. And that is done.