
How To Connect Your Custom Domain To Your Clients on Automation Software Account
WARNING!!! If your custom domain have a currently running website and run through these steps, YOU WILL LOSE ACCESS TO THE CURRENT WEBSITE.
To proceed, make sure that you are ready to move your custom domain entirely over to Clients on Automation Software.
If you intend on keeping some of your content on another hosting platform and accessible via the custom domain that you're going to connect to your Clients on Automation Software account, you may want to consider using a Custom Subdomain and follow the instructions here to Setup a Custom Subdomain instead.
IMPORTANT: Please follow the instructions below closely, only if you're comfortable dealing with it (it's not that difficult after all...).
But if you want to get rid of all the hassle, our team can set it up for you... FOR FREE! Yes, that's right! Just reach out to our Support and we will usually be able to complete it within 24 hours. Sit back and relax while we lift all the burden for you.
Or continue with the step by step instructions below.
Step-by-Step Instructions
Follow these instructions in the exact order listed below in order for your DNS to properly connect to Clients on Automation Software.
Please note these instructions set up your domain as domain.com (We do not recommend using www.domain.com as the instructions will be different. However, the www version will still redirect back to your root domain.)
Connect Custom Domain with Clients on Automation Software
Step 1: Create a FREE Cloudflare account here (if you have an existing Cloudflare account, move to the next step).
FAQ: What is Cloudflare and why do I need that?
Answer: Fundamentally, Cloudflare is a large network of servers that can improve the security, performance, and reliability of anything connected to the Internet. Which is why we leverages Cloudflare's infrastructure to route your domain. That in return provides security by protecting your site from malicious activity like DDoS attacks, malicious bots, and other nefarious intrusions. It increases your Site Speed significantly as well - which means that allows you to make more SALES.
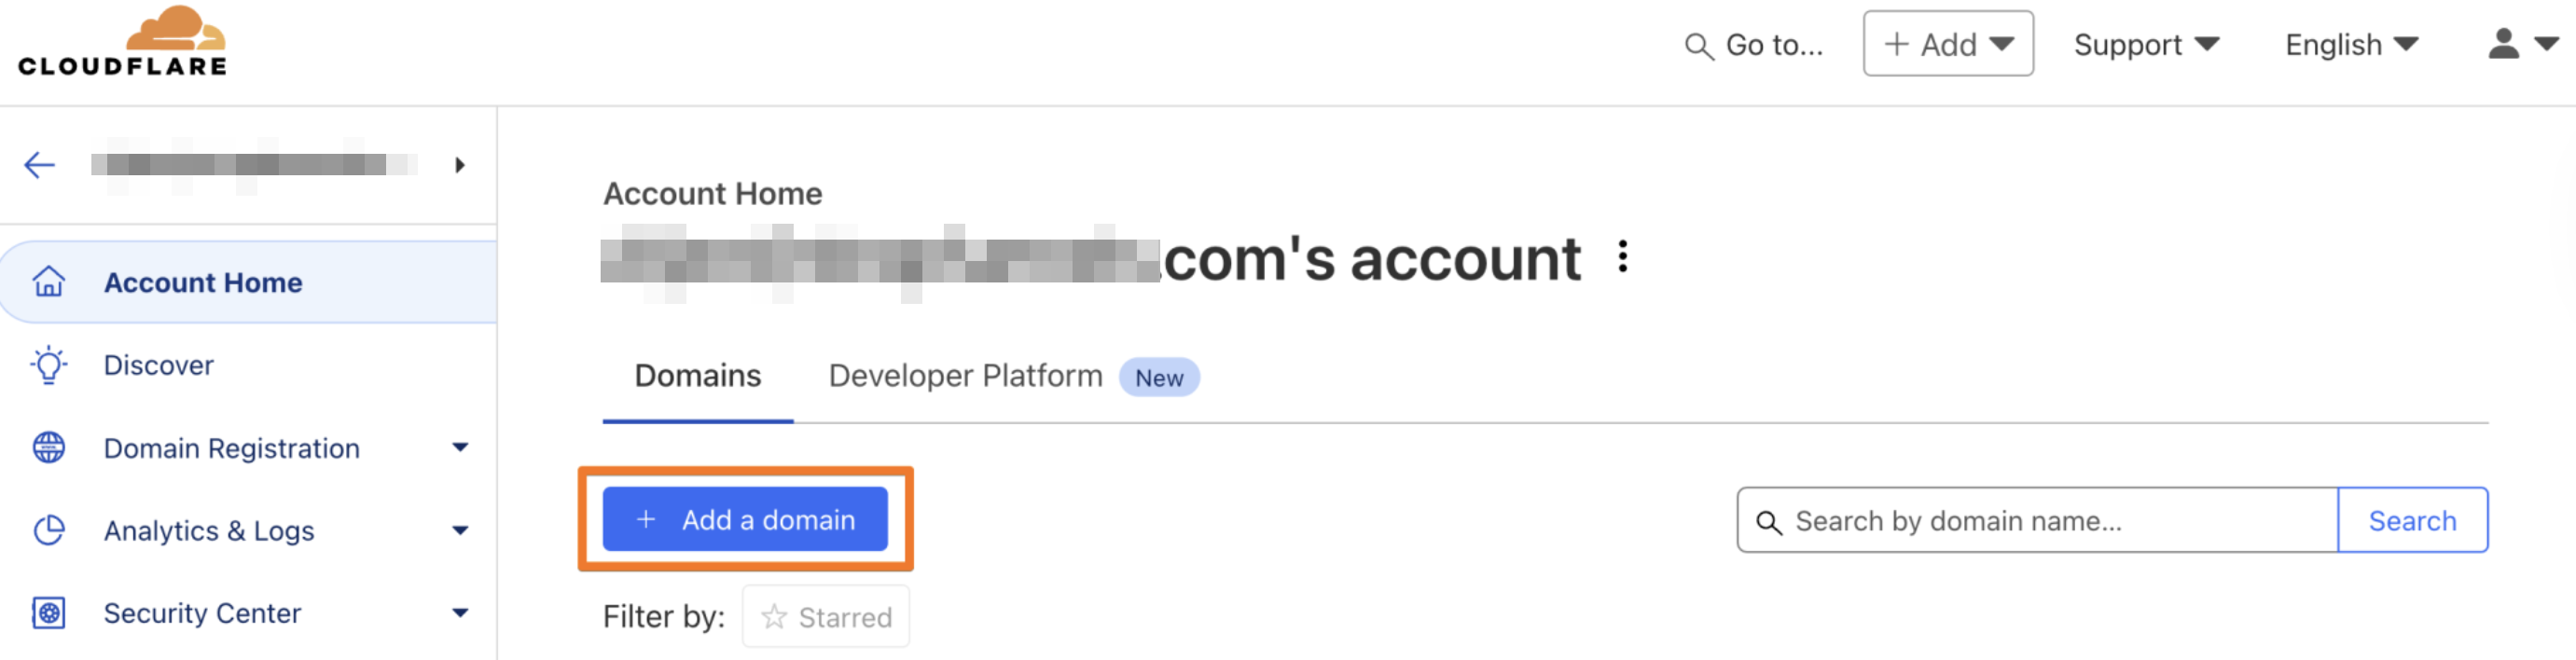
Step 2: On the Account Home of Cloudflare, click the Add a Domain button.
Step 3: Type in your custom domain as: yourdomain.com (without the www), and Select Quick scan for DNS records then click Continue to proceed.
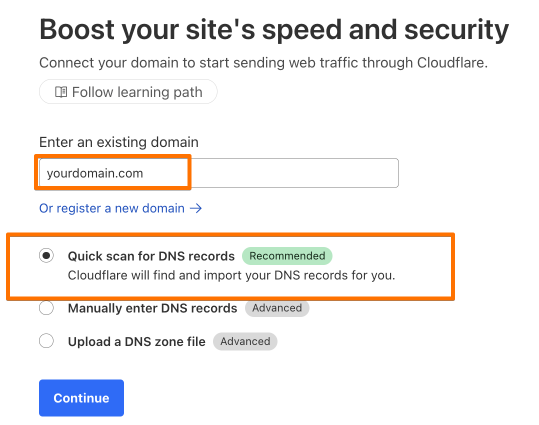
Note: (Quick scan for DNS records allows you to pre-load existing DNS records from your provider, making them visible in Cloudflare DNS.)
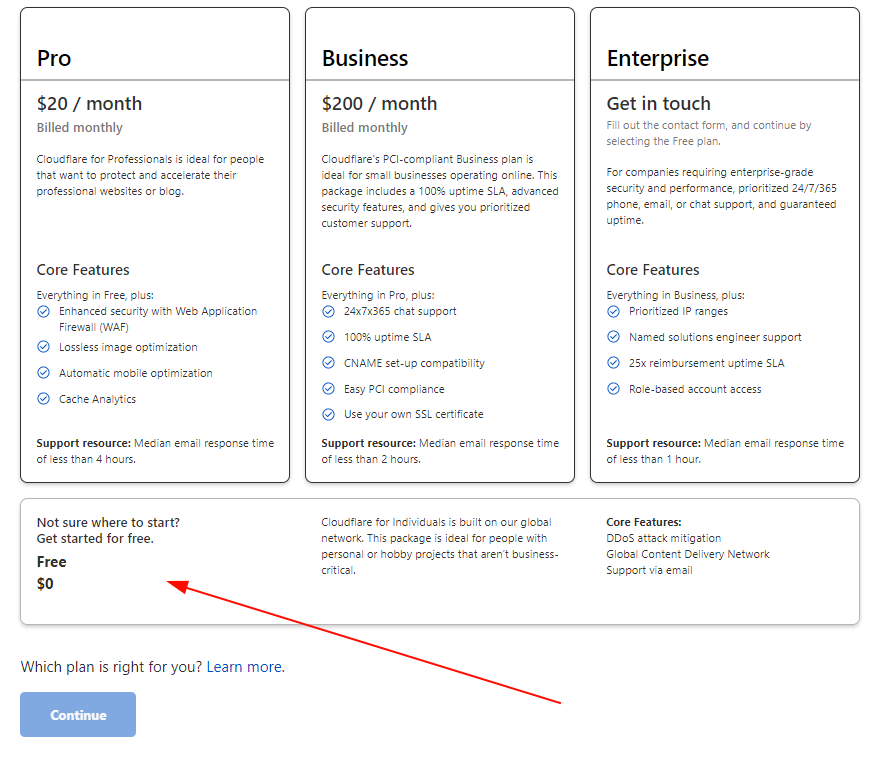
Step 4: Select the Free plan and click Confirm Plan.
NOTE: Your current DNS configuration from your domain registrar will now be copied into your CloudFlare account.
(When adding DNS records, we recommend setting the Proxy Status to Proxied.)
Step 5: Add or Edit your A record to point to Clients on Automation Software' Server in your DNS settings by inputting the following and hitting Save:
Type: A
Name: @
Value: 3.225.173.167
Proxy Status: DNS only (Grey Cloud)

Step 6: Add or Edit your "www" CNAME record by using the following inputs and hitting Save.
Type: CNAME
Name: www
Value: yourdomain.com
Proxy Status: Proxied (Orange Cloud)

Step 7: Click Continue. This will take you to the Change Your Nameservers page as shown below. We DO NOT need to do this now, and will continue to change the nameservers after Step 12 below.
Do not worry about losing the nameservers records as we can still access it in the Overview tab afterwards.
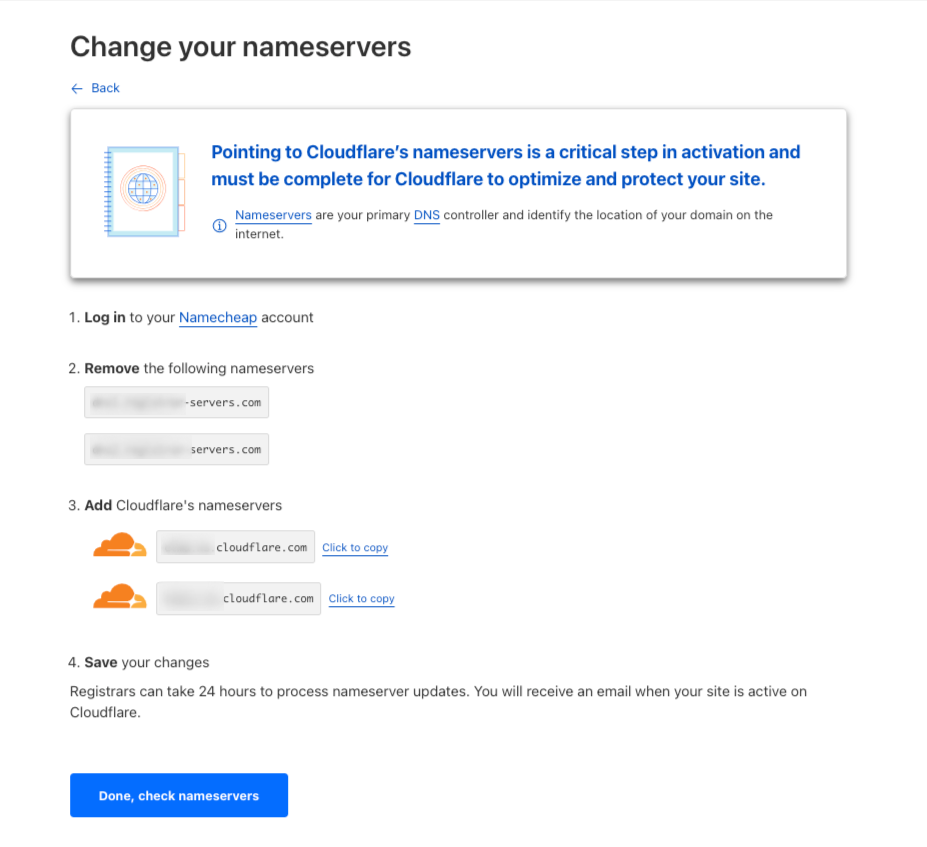
Step 8: Go ahead and click "Done, check nameservers". You will now see a Quick Start Guide page. This is for you to configure your domain settings to improve security and optimize your site's performance.
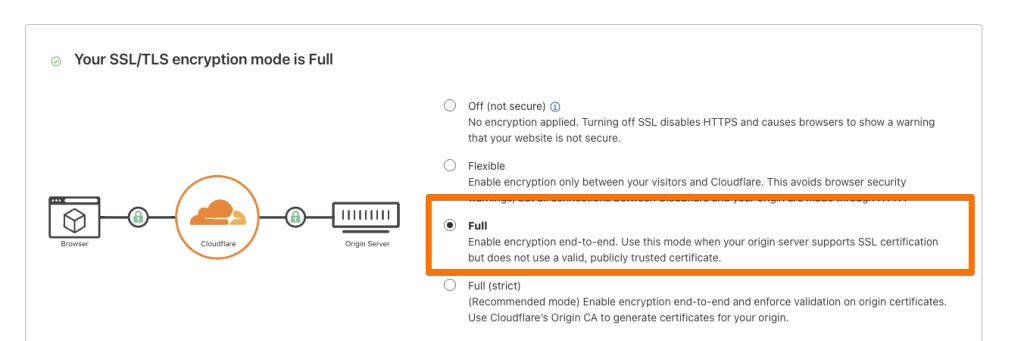
Step 9: Go to SSL/TLS > Overview and ensure the encryption is set to Full.
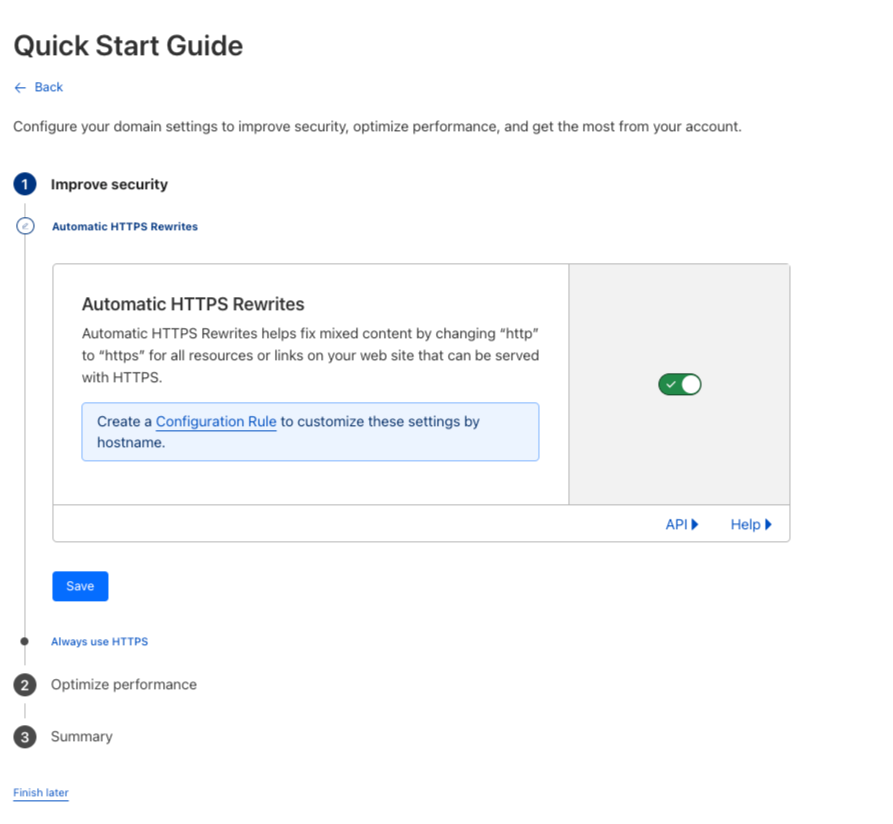
Step 9.5: After setting it to Full, go to SSL/TLS > Edge Certificates to toggle the configuration below.
- Improve Security:- Automatic HTTPS Rewrites: This should be set as "Enabled".
 - Always use HTTPS: This should be set as "Disabled". Click "Save".
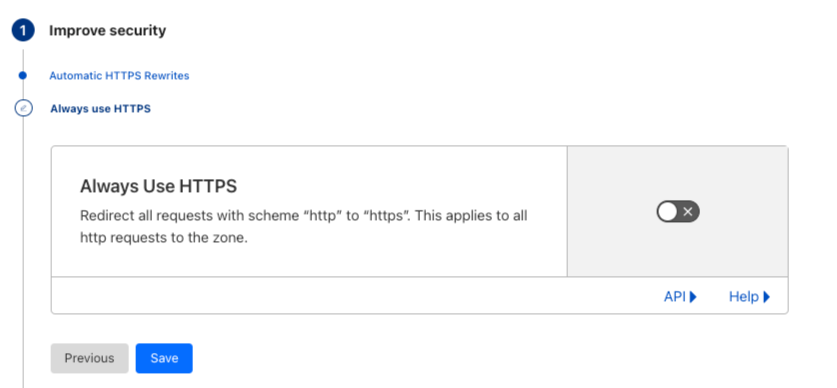
Step 10: And you're almost done. You will be redirected to the Overview page which requires you to complete your Nameservers setup. We will continue with that after Step 12.
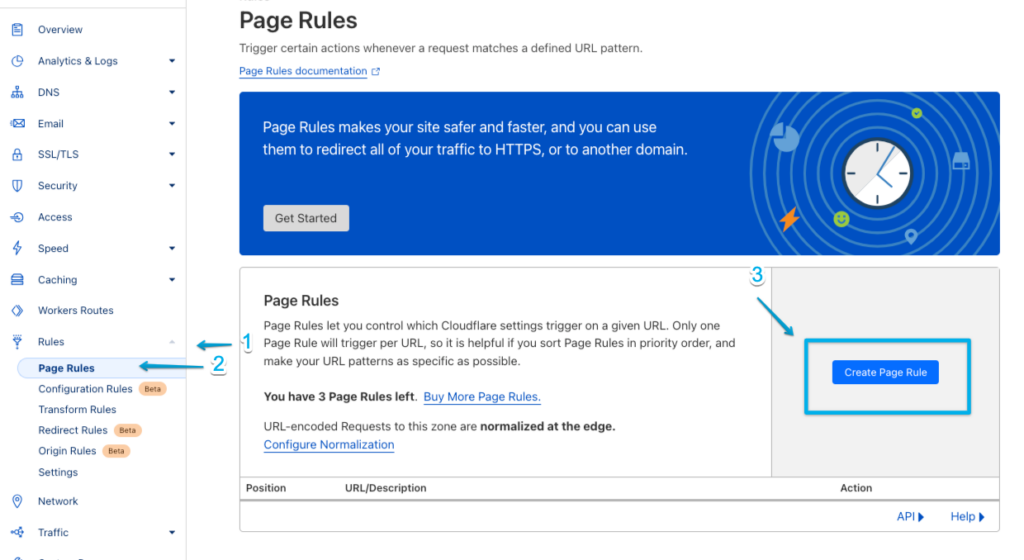
Step 11: On the left menu, go to Rules > Page Rules > Create Page Rule
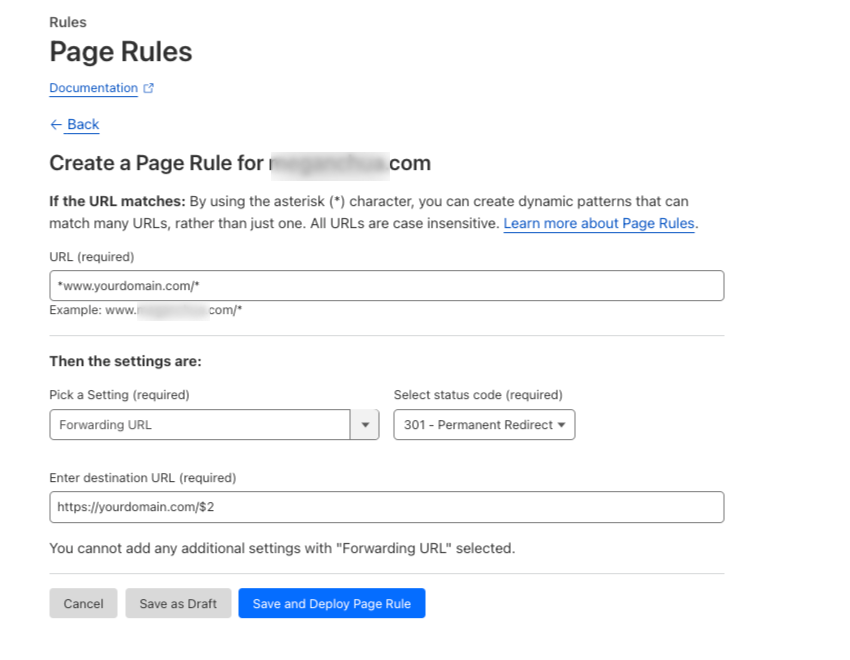
Step 12: Use the following information by replacing your own custom domain name in place of "yourdomain.com".
In the first field URL (required): *www.yourdomain.com/*
Then the settings are:
Pick a Setting: Forwarding URL
Select status code: 301 - Permanent Redirect
Enter destination URL: https://yourdomain.com/$2
Click "Save and Deploy Page Rule"
Now that you've completed Step 1 to Step 12 of your custom domain connection. Good job! That was easy right?!
Step 13: You are now ready to change your domain name servers. Go back to the Overview tab to retrieve your Cloudflare Nameservers records. Then, follow the guides available HERE.
Step 14: Once the nameservers have been updated, you can finally connect your domain to Clients on Automation Software account. Here's how: SEE HERE